• Contact-Strip
• Setting up contact-strip and back protection of the plate
• Degreasing the plate
• Varnishes or Resists
Contact-Strip
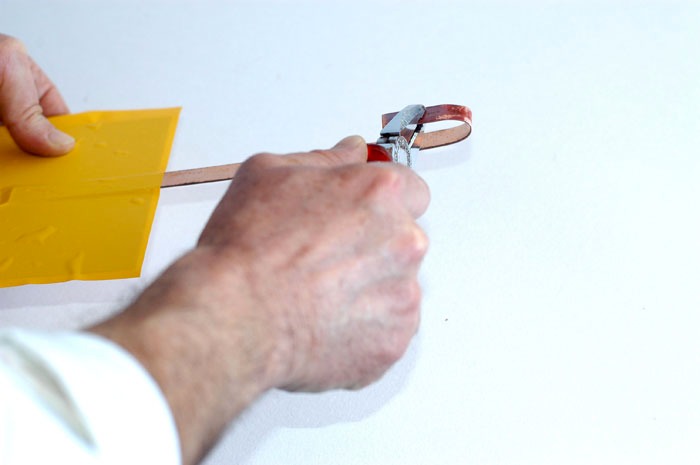
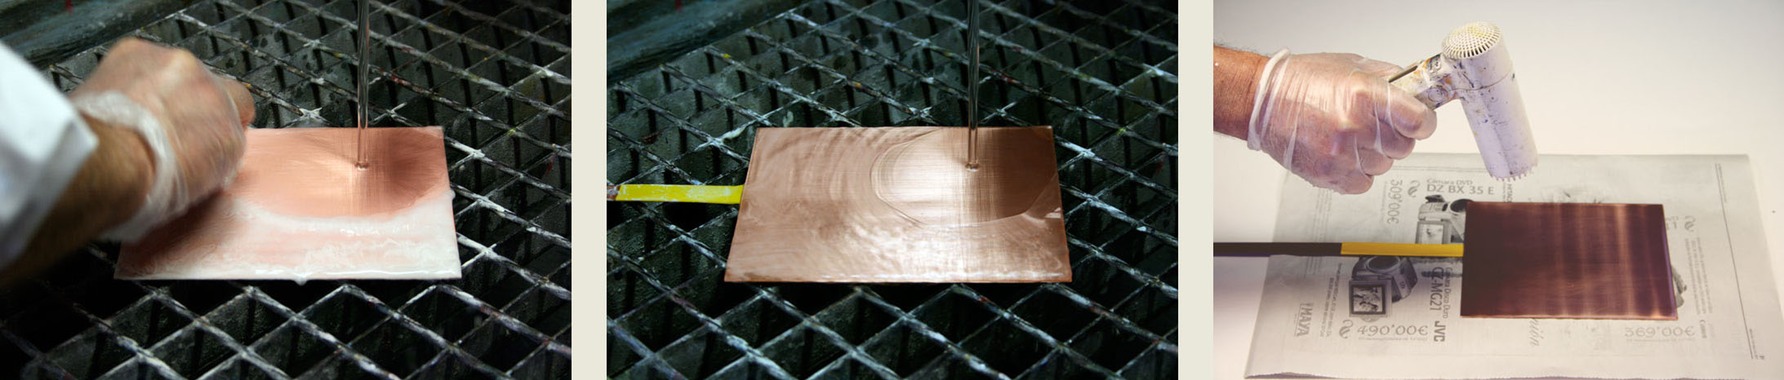
You should prepare a "contact-strip". The purpose of the contact-strip is to conduct electricity to the plate that you are going to etch. Cut a strip of the same metal that you are etching; it should be 1mm thick, 1.5cm wide, and about 12cm long. Next, prepare a piece of self-stick plastic that is a little bigger than the plate size.
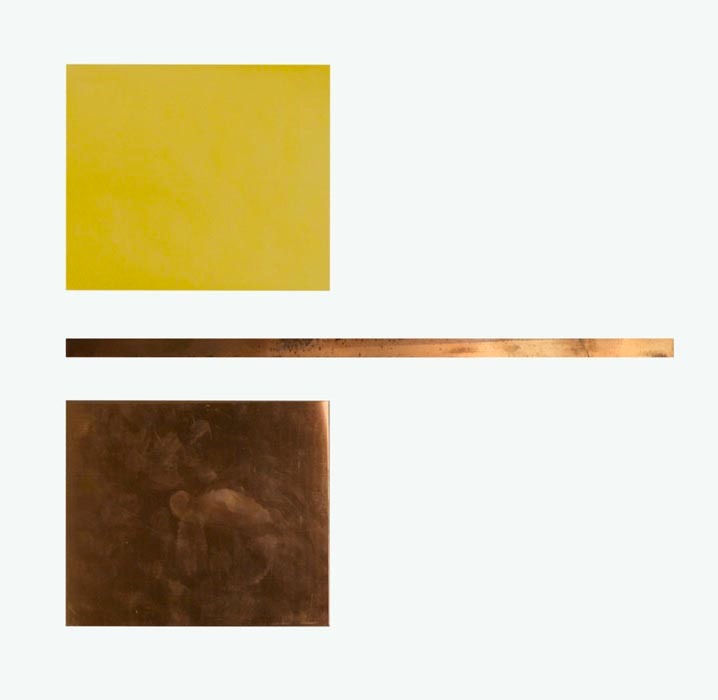
Self-stick plastic (yellow), contact-strip (copper), plate (copper)
Setting up contact-strip and back protection of the plate
I usually sand the area of contact of both the plate and the contact-strip to ensure a good electrical contact and flow of electricity. If the strip has previously been used for etching then it is advisable to clean the area of contact well with a file or sandpaper. It is very important that the areas of electrical contact between the different components are always cleaned properly.
Remember to use a contact-strip of the same metal as the plate which is to be etched.
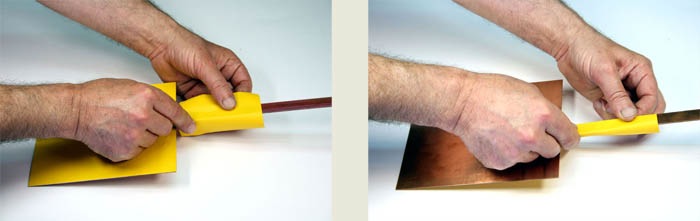
To obtain a good distribution of the electric current, the strip is placed in the centre of the back of the plate. Place the contact-strip on the back of the plate and cover both with the self-stick plastic: this serves to attach the contact-strip and to protect the reverse of the plate from electrolytic corrosion at the same time.
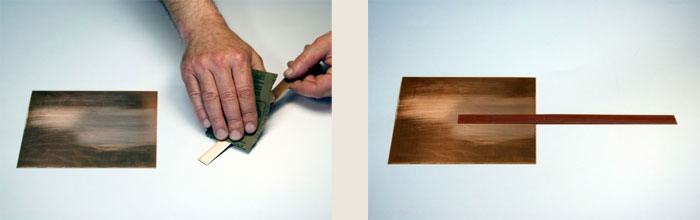
Sanding the contact-strip Contact-strip and plate
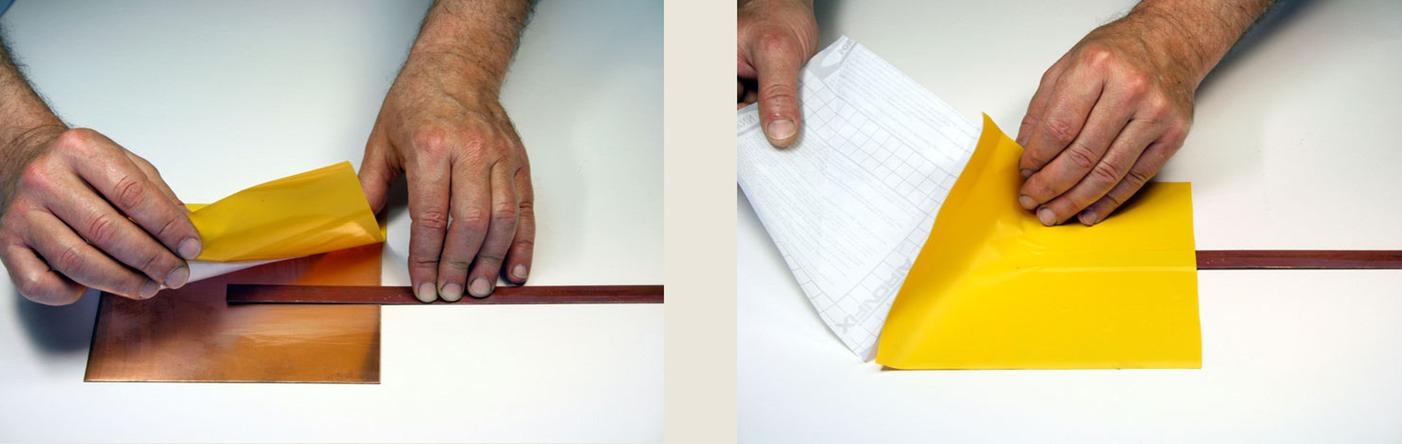
Protecting the back of the plate and attaching the contact-strip with self-stick plastic at the same time
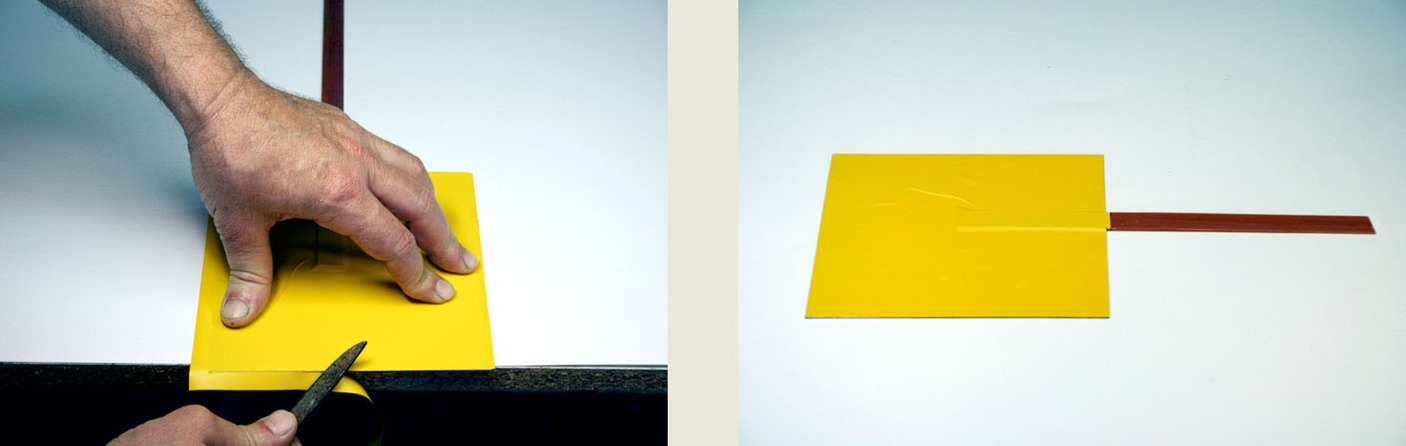
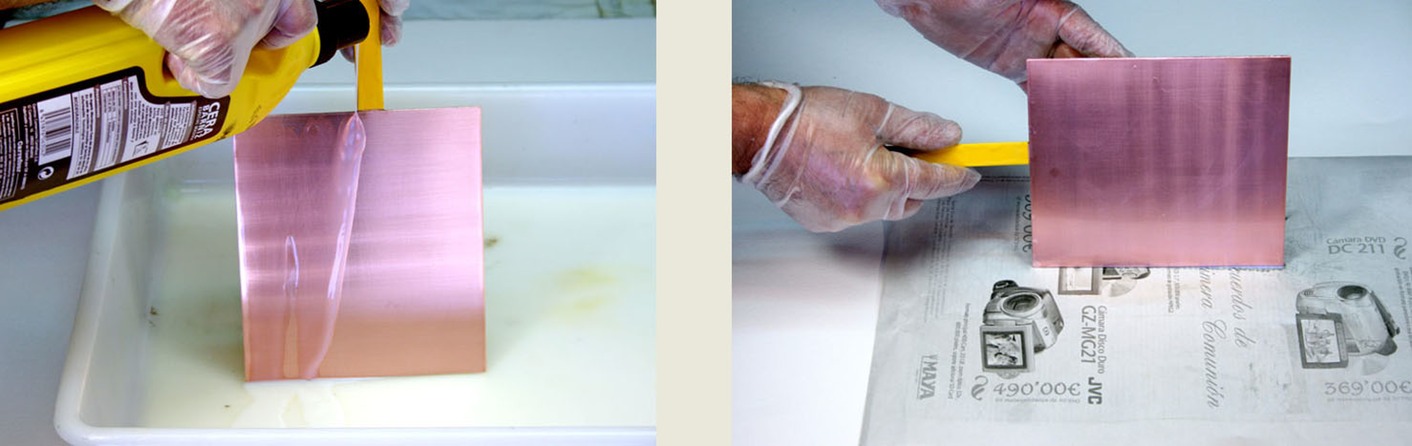
Cut off spare plastic Protected plate
Bend the contact-strip to hang it in the tank
Contact strip protection
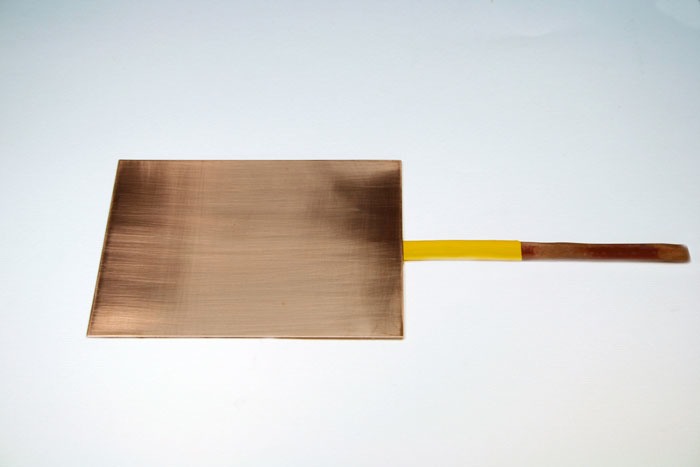
The plate is ready
Degreasing the plate
Before applying resists you should thoroughly degrease the plate, using a mixture of vinegar and salt. I use a little whiting (Calcium carbonate), a powder that is mixed with vinegar and rubbed onto the plate with a cotton cloth. The plate is then washed with water and dried with paper or a cloth then with hot air, until the plate is perfectly degreased. You can also degrease the plate using a teaspoon of citric acid and a teaspoon of sodium bicarbonate mixed with a little water and rubbed onto the plate with a cloth until the plate is degreased; wash with water and dry as below.
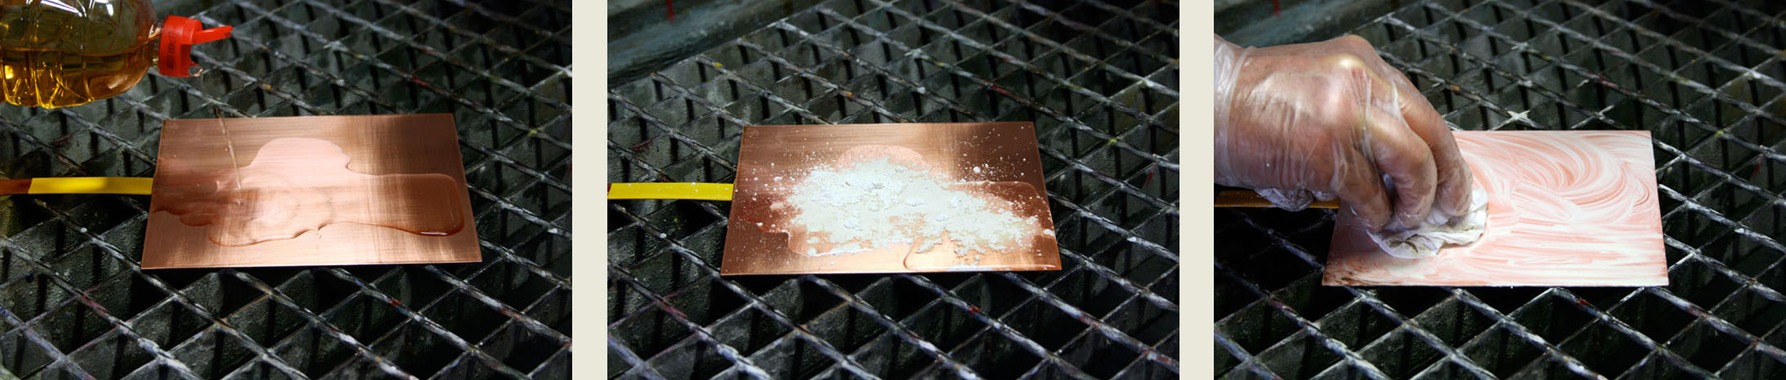
Pouring vinegar onto the sanded plate. A little of whiting. Mix the whiting and vinegar and rub into the plate with a cotton cloth
Wash off with water Rinse thoroughly with more water Dry the plate with a paper and hot air
It should be noted that any small amount of grease left on the plate, for instance fingerprints, will prevent etching in that area of the plate.
Varnishes or Resists
You can protect the plate with any resists or grounds you desire, taking into account that an electrolytic action will bite strongly anywhere that is not fairly well protected. I am currently working on an alternative resist, capable of acting as a soft or hard ground, using oil-based intaglio ink diluted with a little oil and a few drops of cobalt dryer which is then applied to the plate with a roller. Any ground/ink must be completely dried on the plate - use a hot-plate - before the plate can be introduced into the electrolytic bath. You can dry the ground/ink before or after drawing into the plate.
You can also use the ACRYLIC RESIST ETCHING options recommended on the web site non toxic print, the INTAGLIO MANUAL of Acrylic Resist Etching by Friedhard Kiekeben and the BEGINNERS COMPENDIUM by Donna Adams, which give information about a large number of acrylic products. I have successfully used the acrylic wax Future produced by Johnson - applying two coats of varnish and drying thoroughly with hot air between each layer.
Applying an acrylic resist Drain the remaining resist from one side of the plate
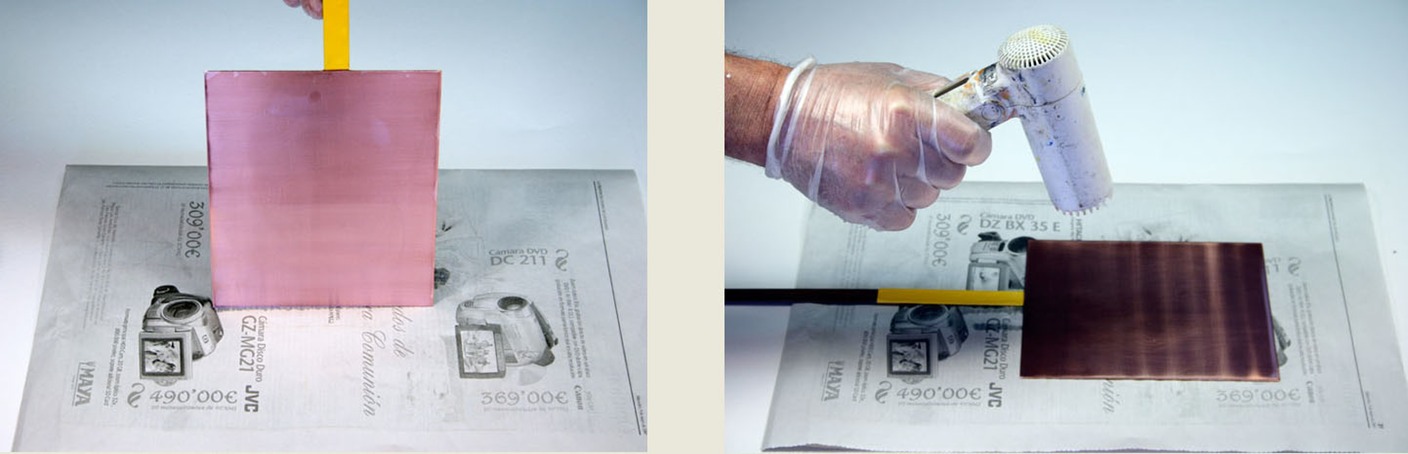
Draining the excess resist on the other side of the plate Dry the resist using hot air
Proof of acrylic resist on copper
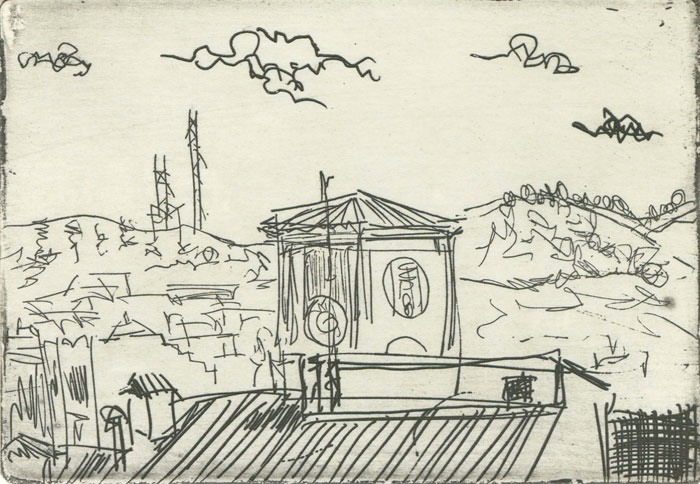
Electrolyte concentration 250g to 1 Liter of water. Voltage 0.5V.
Bitten at two intervals of 10 minutes and two of 15 minutes.